converting images to monochrome in adobe camera raw 10.3
There are many ways to create black and white images from colour RAW files and, over the years, having graduated from the analogue dark room, I've used most techniques and third party conversion plug-ins; rejected many and eventually focussed on the basic methods in Photoshop and Camera Raw. Now, Adobe has made available an update in Camera Raw and Lightroom that provides a very wide range of colour and monochrome profiles (and enabled the use of LUTs by third parties) as an alternative approach.
For those photographers that prefer to work in monochrome there are 17 new choices of black and white profiles to try out. My first impressions are that they are quite useful as starting points, offering a broad range of conversion from fairly flat tonal gradations through to very contrasty results. Here's what you see when you drill into the Profile Browser in Camera Raw - from left to right - open the browser, select B&W and then scroll down through the 17 new options:

The new Monochrome Profiles in Adobe Camera Raw Update 10.3
When you select a profile, you can preview it in Camera Raw, and of course these profiles also work in Lightroom.
The 17 options provided offer a wide range of tonal gradation, from faorly even toned all the way through to quite contrasty conversions. Here's B&W 01 on my slected image:

Adobe Camera Raw 10.3 - Monochrome Profile 01
The new capabilities don't stop there though. In the screen shot above you can see that there's a slider that allows you to vary the amount of the conversion that's applied to the image, which helps you 'blend' to taste.
However, even more importantly, you get to this new starting point without adjusting any of the standard sliders in Camera Raw. This means that you still have all the other adjustments available to you after this profile is applied - so you can apply all the standard sliders and adjustments until you reach a point where the image looks the way you want. This includes using the standard colour sliders on the black and white conversion tab in Camera Raw as well as graduated filters and adjustment brush 'layers' to further refine the image.
I think this is a major step forward for monochrome (or colour) workers, in that you now have a broader choice of starting points in your initial rendering and yet still retain all your favourite adjustments to fine tune the resultant image. Of course, for those that want to produce high quality black and white images without too much effort, just adopting your selected profile will get you there in one step!
One of my favourite ways to begin a monochrome conversion is to use the DxO FilmPack Elite V5 plug-in profiles. Two of my favourites from DxO are the Agfa Scala 200x and the Ilford FP4 Plus 125 profiles, the former being a darker conversion but with a broad range of tonality, and particularly good on skin tones, the latter being more even and brighter overall.
I use these two and DxO's Kodak Tri-X 400 profile fairly often, depending on the tonality of the initial RAW conversion. These hark back to my old film days and were favourite film choices at the time. As in the case of the Camera Raw profiles you can adjust the final image post conversion in the FilmPack application, which I do, and then export the result to Photoshop for my final editing.

Monochrome Conversion Using DxO FilmPack 5 Left: Agfa Scala 200x Right: Ilford FP4 Plus 125 Profile
These new profiles from Adobe do however provide some excellent starting points as an alternative, which is particularly welcome capabilities while still in the ACR environment and can therefore contribute to a faster workflow when you consider you can do almost anything now in Camera Raw alone.
Given that potential, I'll be looking very closely into working with these profiles and comparing them with my current choices. I've reproduced the first 12 of the monochrome profiles below, for comparison, as the rather small thumbnails in Camera Raw don't make it easy to clearly see the differences. The remaining profiles are the fairly standard emulations that would result if you used a blue, green, yellow, orange or red lens mounted filter, which I have not reproduced here.

Adobe Camera Raw Monochrome Profiles 1-3

Adobe Camera Raw Monochrome Profiles 4-6
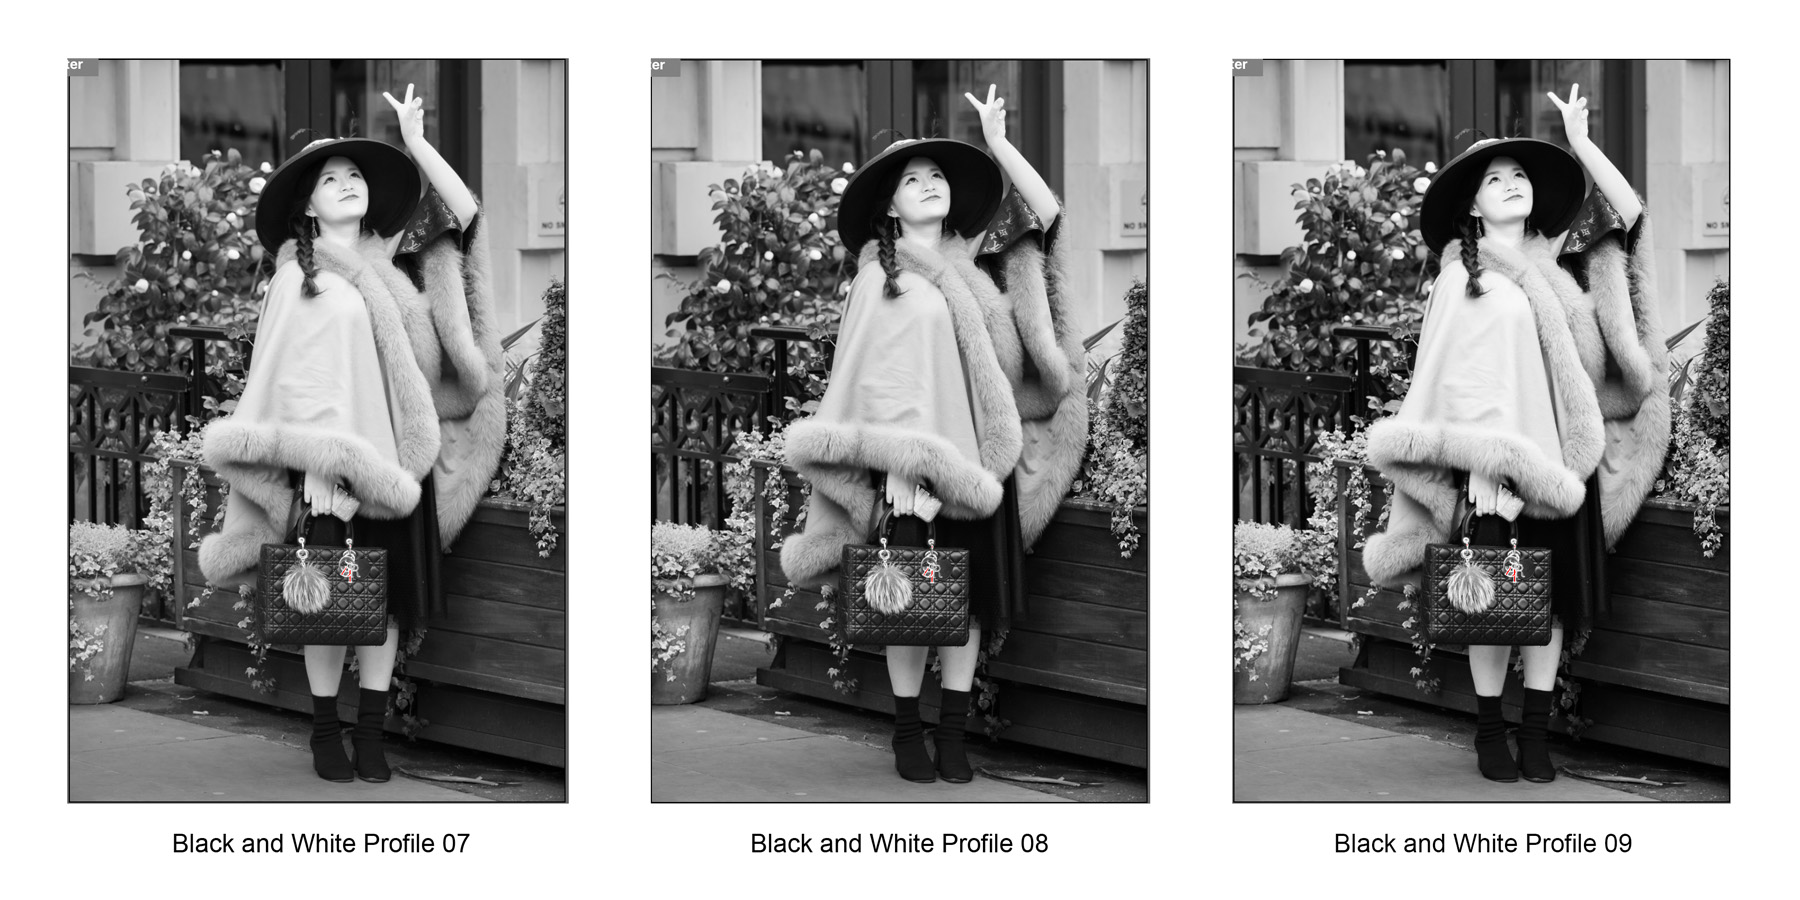
Adobe Camera Raw Monochrome Profiles 7-9

Adobe Camera Raw Monochrome Profiles 10-12
When comparing the various options I would recommend looking separately at the woman's cape in the foreground, her handbag. her face and forearm, the underside of her hat, her dress and boots, the wooden fence, the greenery in the background and the shade of the rear wall, comparing each element at a time across the whole set before selecting your favourite profiles.
example using DxO versus ACR monochrome profiles
The image below is a very significant crop from the Leica SL image in this comparison article. It was taken hand held in London's Covent Garden using a Leica SL mirrorless camera with a Leica 180mm F2.8 Elmarit R lens via an R-M plus M-L paired adapter. It's a remarkably sharp image and shows the quality of the camera and venerable 1997 lens combination. It was my first outing with the lens which had just arrived from a German Leica dealer who specialises in previously loved equipment. The image was rendered initially in ACR then exported to Photoshop where I used the DxO Agfa Scala 200x profile and modified the rendering before passing it back to Photoshop for some additional localised dodging and burning, curve and a final levels adjustment. This is my usual workflow:

Leica SL - Cropped Image from Leica SL and Leica 180mm f2.8 R Lens - DxO Agfa Scala 200x based
Below is the version rendered in Adobe Camera Raw using the B&W No10 profile, adjusting the red, yellow and orange sliders on the black and white conversion tab and some local adjustment brush burning in of the distracting bright flower heads in the background. Then the image was opened in Photoshop for final curve and levels adjustments.

Leica SL - Cropped Image from Leica SL and Leica 180mm f2.8 R Lens - ACR B&W No10 based
I think the differences in outcomes are relatively subtle and I would be happy with either final rendering.
One interesting result was that when I saved the ACR B&W No10 profile version as a jpeg file, Photoshop reported that it created a 1.7Mb file at a maximum quality versus the DxO based rendering which required only 1.1Mb. The implication is that the ACR version possesses more tonal information than the DxO one, although I couldn't see the diference on my monitor. Hmmm - food for thought
conclusions
Having spent only a short time with this new ACR update, I felt compelled to compare outcomes using my standard references. Overall, my initial impressions are that the ACR B&W profile 01 is pretty close to DxO's Ilford FP4 Plus 125 in tonal character and the ACR B&W profile 10 is very similar to DxO's Agfa Scala 200x, being very broad and tonally even, with particularly nice skin tones. The B&W No10 renders lighter overall than the DxO conversion but that is easily remedied with an uplift in exposure afterwards.
I will probably find other comparable profiles, to create more or less contrasty results on occasion, but when you consider how many additional adjustments you can make using the standard sliders on top of this one-click starting point there's certainly plenty of scope in these new facilities, and there's always the chance to import third party profiles to add to the 17 new choices.
Summarising, I was able to create almost the same quality of rendering I normally produce using these new monochrome profiles together the additonal adjustments available in ACR. This led to a shorter, less complicated workflow, saving time and effort. Recommended.